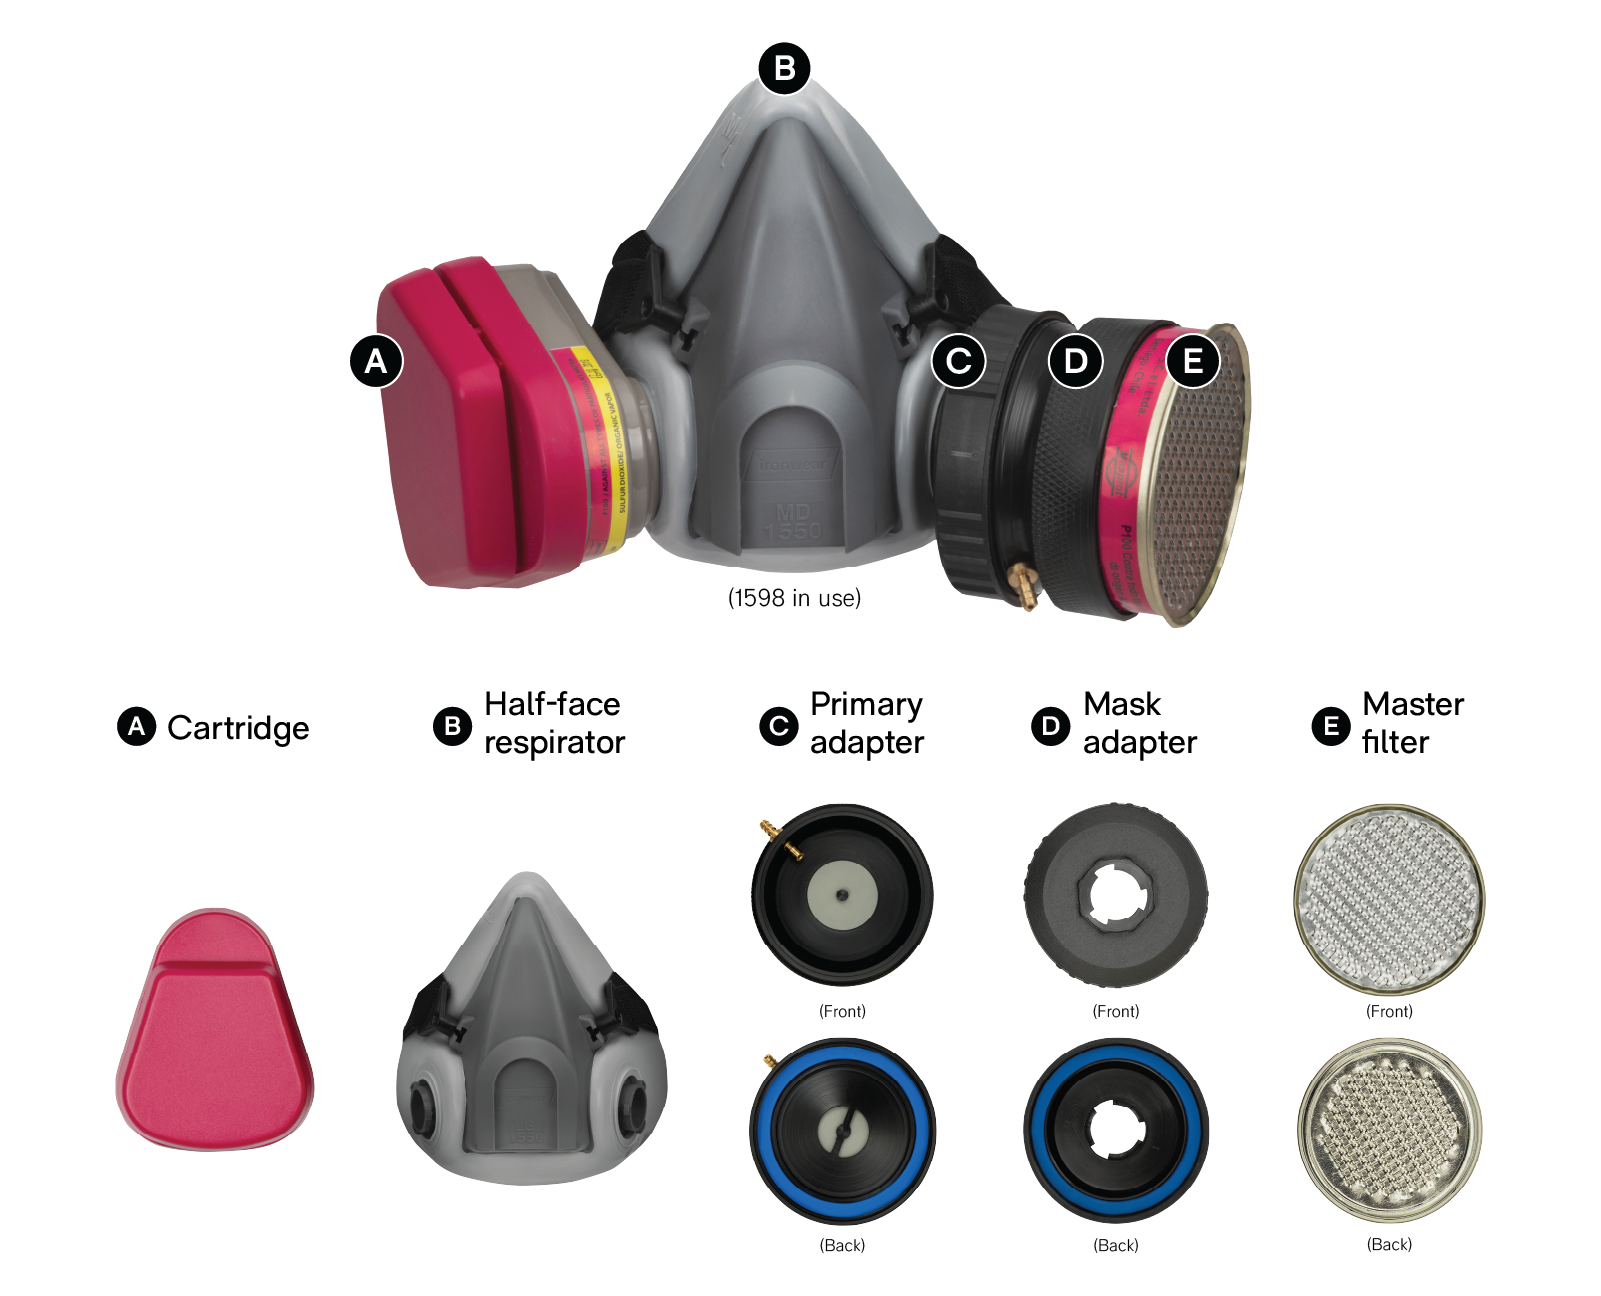
The Ironwear 1598 Quantitative Fit Test Kit is an adapter for cartridge respirators. This adapter allows the respirator to be connected to a quantitative fit testing machine, which evaluates the wearer’s donning technique to determine if an adequate seal has been formed.
The following describes how to properly use the Ironwear 1598 Quantitative Fit Test Kit. Though it is intended for use with our 1550 Half-Face Respirator, similar cartridge respirators may also be used. Any quantitative fit testing device may be used to perform the test.
This guideline is not intended to outline or replace any guidance from government or health agencies. For complete regulations on fit testing procedures, please consult OSHA’s protocols on 1910.134 App A.
Before You Begin

Start by opening the box and separating the contents. The full kit includes 3 pieces: the mask adapter, the primary adapter and the master filter.
The mask adapter connects directly to the respirator the same way a normal filter cartridge would. It is the smallest component and the only one without threads for twisting in.
The primary adapter is the largest component and can be identified by the nozzle protruding from the middle. This component will connect to the mask adapter.
The master filter is easy to identify for its unique texture, as well as the prominent red striping around the edges. This will be the final component in assembly.
Before assembling, make sure that a normal cartridge is affixed to one side of the respirator (the side that will not be used for the adapter).
Once all pieces are separated and a normal adapter is affixed to one side of the mask, the adapter is ready for assembly.
Step 1
First, connect the mask adapter directly to the mask’s cartridge holder by aligning the grooves and twisting until the mask adapter is firmly attached.
Step 2
Next, connect the primary adapter to the mask filter. Do this by aligning the threads on the primary adapter with those on the mask filter, then lightly twisting until resistance is felt.
Warning:
Do not twist too hard or create too tight of an attachment. Doing so may damage the threads and compromise the quality of the seal, which may cause misleading test results or failure.
Step 3
The master filter will be connected to the primary adapter the same way as in Step 2. Similarly, twisting too hard or creating too tight of an attachment may damage the filter and result in misleading test results or failure.
Step 4
Once assembly is complete and OSHA protocols have been ensured, the quantitative fit test is ready to begin. To do this, simply connect the hose of the fit test device to the nozzle of the primary adapter and turn the device on.